If you are working on video and flash productions, video cue points (event cue points to be specific) are an essential tool for synching videos with other on screen events. We use it in our alpha-video productions, where the virtual host’s words are synched with flying in text, images, and backgrounds. Your images are always in synch with your video, because the video triggers the actions.
Here is an example…

When I first started producing these types of projects, I would painstakingly insert cue points by scrolling the video in the Flash Video Encoder to the place where I thought the cue point should go. For projects that had 100-200 cue points, it was a daunting task. Plus, if I needed to add more cue points later, I would have to re-insert EACH CUE POINT AGAIN…one at a time…FORGET IT!
Using XML files for cue points makes so much sense, because you are creating a separate list of cue points that you can simply import into the video, and save. Using this method will save you a ton of time and effort for both the initial creation of the project, and subsequent updates (if needed)!
Here is my method:
TOOLS:
Final Cut Pro
Flash CS3
Microsoft Excel
BBEDIT Lite
STEP 1 – Setup Your Spreadsheet:
In Excel, Set up a spread sheet like the one below. Use the following headings:
STEP 2 – Record all video cue points, and assign each a cue number and a description:
In your video editor (We use Final Cut Pro) find the places that you want to sync action, and record the times in the “Video Time” column. Be sure to keep them in numerical order. Enter your description for each cue point. Each time gets its own Cue #. HINT: Use different color fonts for different actions.
STEP 3 – Convert video frames to Flash samples:
For our purposes, we will be talking about video time as seconds and frames. For example, a video time of 12:07 is 12 seconds, 7 frames. To convert video time to Flash time, we leave the seconds alone, and convert the frames to samples. Here’s how:
There are 1000 Flash samples, and 29.97 video frames (NTSC) in one second. To convert video frames to Flash samples, use the following formula 1000/29.97. This equals 33.333. With our example of 12:07, multiply 7 frames by 33.333, this equals 233. Last step, simply put your new Flash sample number AFTER the seconds. 12 seconds 07 frames = 12233 samples.
To keep things simple, I created a cross reference chart of video frames and samples.
STEP 4: Create your xml file
Using you text editor of choice like notepad, etc. (we like BBEdit Lite) Create your XML cuelist document by using the following code:
//HEADER CODE:
<?xml version="1.0" encoding="UTF-8" standalone="no" ?>
<FLVCoreCue points Version="1">
//CUEPOINT CODE:
<CuePoint>
<Time></Time>
<Type>event</Type>
<Name></Name>
</CuePoint>
//FOOTER CODE:
</FLVCoreCue points>
STEP 5:
COPY and PASTE the CUEPOINT CODE section for as many cue points which are in the video. Then, key in the FLASH TIME and corresponding Cue # for each cuepoint like the example below.
<CuePoint>
<Time>12233</Time>
<Type>event</Type>
<Name>3</Name>
</CuePoint>
NOTE:
Your CUEPOINT cue #’s and Flash times need to be in sequential order. If not, you will get an error when you try to import the XML document into FLASH. Be careful with your cutting and pasting, and double check your code!
STEP 6:
NAME and SAVE your XML document using “.xml” as the DocType. For example, “projectcues.xml”
STEP 7:
Open the Flash Video Encoder, and click on the Cue Points Tab. Click on the UPLOAD (file folder) button.
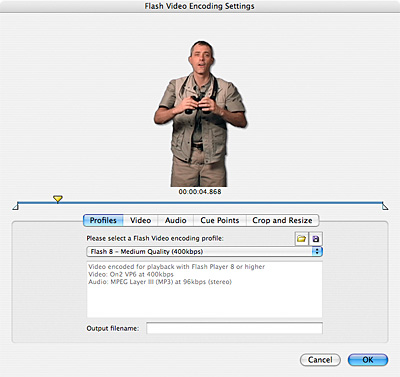
If your XML file was created correctly, all your cue points will show up in the cue points window on the left side. If not, see step 5.
STEP 8:
Tweak your video settings, and finish encoding your video into the final FLV file.
If all is well, all your cue points are embedded in your FLV file, and they are FRAME and SAMPLE ACCURATE.
This has saved me a lot of time when I have hundreds of cue points to import. Once you get used to the technique, you will get faster, and may figure out a few other shortcuts of your own. Let me know your thoughts.
Stay tuned for Part 2 where we will cover the next steps to putting the cue points to work.
Cheers for now!